

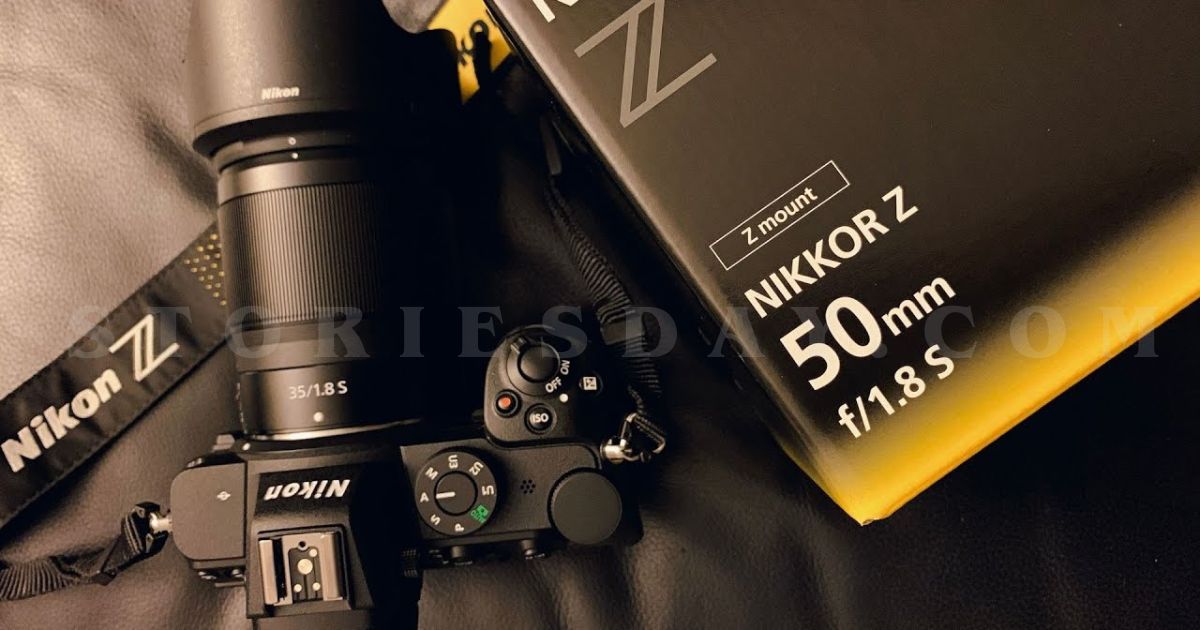
The Nikon Z5 has become a favorite among photographers who want the benefits of a full-frame mirrorless camera without stepping into a professional price range. It combines excellent image quality, dependable autofocus, in-body image stabilization, and intuitive controls in a compact body that suits travel, portraits, landscapes, and everyday photography.
This Nikon Z5 pocket guide is designed to help you understand the camera beyond its basic functions. Rather than explaining every menu item, it focuses on the settings and techniques that make the biggest difference in real-world shooting. Whether you’re upgrading from a DSLR, switching from another mirrorless system, or buying your first full-frame camera, these practical tips will help you build confidence behind the lens.
Learning how your camera works is just as important as choosing the right lens. Once you understand exposure, autofocus, customization, and composition, you’ll spend less time adjusting menus and more time capturing memorable photographs.
Understanding the Nikon Z5
The Nikon Z5 is built around a 24.3-megapixel full-frame CMOS sensor powered by Nikon’s EXPEED 6 image processor. This combination delivers detailed images, pleasing color reproduction, and reliable performance across a wide range of lighting conditions.
Unlike many entry-level cameras, the Z5 includes advanced features that support photographers as their skills grow. Its ergonomic grip, weather-sealed body, and intuitive control layout make it comfortable for extended shooting sessions, while its compatibility with Nikon’s expanding Z-mount lens lineup provides room for future upgrades.
Some of the camera’s standout features include:
- Full-frame CMOS sensor
- Five-axis in-body image stabilization (IBIS)
- Dual UHS-II SD card slots
- High-resolution electronic viewfinder
- Eye-detection autofocus
- Weather-resistant construction
- 4K video recording
- Built-in Wi-Fi and Bluetooth connectivity
These features make the Nikon Z5 equally capable for casual photography and more demanding creative projects.
Setting Up Your Camera the Right Way
A few minutes spent configuring the camera properly can improve your shooting experience from the very beginning.
Charge and Prepare Your Equipment
Before heading out with your camera, make sure everything is ready.
Create a simple checklist:
- Fully charge the battery.
- Insert and format memory cards.
- Attach a clean lens.
- Set the correct date and time.
- Update the camera firmware if a newer version is available.
Keeping firmware up to date can improve autofocus performance, compatibility with accessories, and overall reliability.
Choose Quality Memory Cards
The Nikon Z5 includes two SD card slots, allowing photographers to organize and protect their images more effectively.
Many users prefer one of these storage methods:
- Record duplicate files on both cards for instant backup.
- Save RAW files to one card and JPEG images to the other.
- Use the second card only after the first becomes full.
If you’re photographing weddings, travel, or important family events, using the backup option provides additional security.
Select the Right File Format
Choosing between RAW and JPEG depends on how you plan to use your photographs.
JPEG
JPEG files are ideal for photographers who want images ready to share immediately.
Advantages include:
- Smaller file sizes
- Faster transfers
- Minimal editing required
- Easy online sharing
RAW
RAW files preserve much more image information, making them the preferred choice for editing.
Benefits include:
- Better shadow recovery
- Improved highlight detail
- Greater color flexibility
- Easier white balance adjustments
- Higher overall editing quality
If you’re learning photo editing software, shooting RAW gives you significantly more creative control.
Adjust the Viewfinder and Display
A comfortable display setup makes photography easier, especially during long shooting sessions.
Consider adjusting:
- Screen brightness
- Viewfinder brightness
- Grid overlays
- Live histogram
- Information display
- Auto display timeout
These small adjustments can improve both composition and exposure accuracy while reducing distractions.
Essential Camera Settings
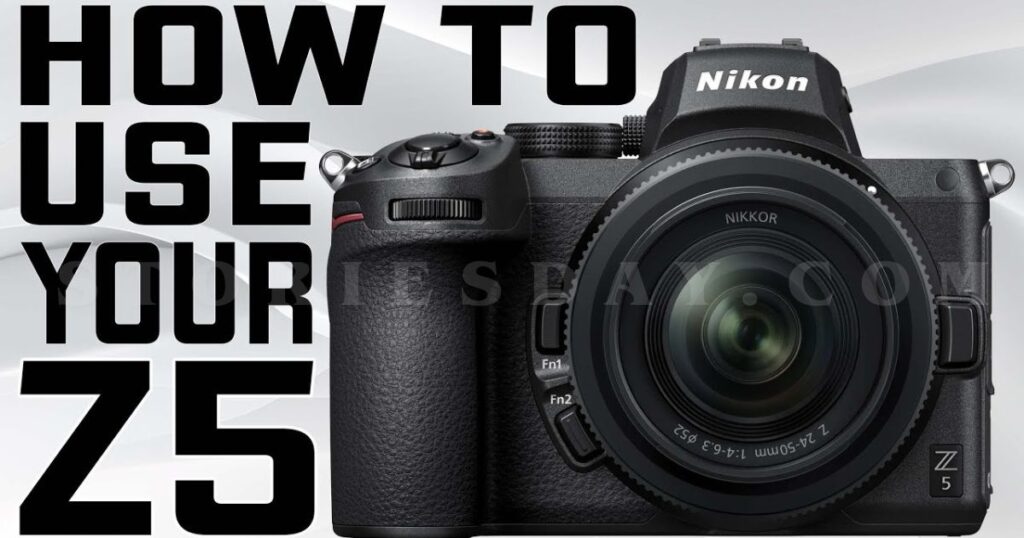
Factory settings are designed to work for a wide range of users, but a few thoughtful adjustments can noticeably improve your results.
Image Quality Settings
For maximum flexibility, many photographers choose:
- Image Quality: RAW or RAW + JPEG
- Image Size: Large
- Color Space: Adobe RGB for editing or sRGB for online use
This combination preserves as much image information as possible while allowing easy sharing when needed.
White Balance
Automatic White Balance performs very well in changing lighting conditions, making it suitable for most situations.
However, selecting a specific white balance can produce more consistent colors.
| Lighting Condition | Recommended Setting |
|---|---|
| Bright sunlight | Daylight |
| Overcast weather | Cloudy |
| Open shade | Shade |
| Indoor tungsten | Incandescent |
| Fluorescent lighting | Fluorescent |
Photographers shooting RAW can always fine-tune white balance later without reducing image quality.
Picture Controls
Picture Controls determine how JPEG images appear directly from the camera.
Common options include:
Standard
Balanced colors and contrast suitable for everyday photography.
Neutral
Produces softer contrast and color, making it ideal for photographers who plan additional editing.
Vivid
Boosts saturation and contrast, making landscapes and nature scenes appear more vibrant.
Portrait
Optimizes skin tones while maintaining a natural appearance.
Experimenting with these presets helps you find a look that matches your personal style.
Active D-Lighting
High-contrast scenes often contain bright highlights and deep shadows.
Active D-Lighting helps balance these areas by preserving more visible detail.
Suggested settings include:
- Low for general photography
- Normal for outdoor scenes
- High only when necessary
- Off when extensive RAW editing is planned
Although useful, this feature should complement good exposure rather than replace it.
Mastering Exposure Basics
Exposure determines how bright or dark an image appears. Understanding how the three exposure settings work together gives you much greater creative control than relying entirely on automatic modes.
The three elements of exposure are:
- Aperture
- Shutter speed
- ISO
Learning how they interact allows you to adapt quickly to different lighting conditions.
Aperture Priority Mode
Aperture Priority is often the most practical shooting mode for everyday photography.
You choose the aperture while the camera automatically selects the shutter speed needed for proper exposure.
This mode works particularly well for:
- Portraits
- Landscapes
- Street photography
- Travel photography
- Everyday family photos
A wider aperture creates stronger background blur, while a narrower aperture increases depth of field for sharper landscapes.
Shutter Priority Mode
Shutter Priority lets you decide how motion appears in your photographs.
Fast shutter speeds freeze movement, while slower speeds create intentional motion blur.
Useful starting points include:
| Subject | Suggested Speed |
|---|---|
| Sports | 1/1000 sec |
| Wildlife | 1/1600 sec |
| Children playing | 1/500 sec |
| Walking people | 1/250 sec |
| Waterfalls (tripod) | 1–2 seconds |
Matching the shutter speed to your subject helps create sharper and more expressive images.
Manual Mode
Manual Mode provides complete control over exposure.
You independently adjust:
- Aperture
- Shutter speed
- ISO
Although it requires more practice, Manual Mode is especially useful for studio work, night photography, long exposures, and situations where lighting remains consistent.
Understanding ISO
ISO controls the camera sensor’s sensitivity to light.
Lower ISO values produce the cleanest images, while higher values allow shooting in darker environments at the cost of increased digital noise.
General recommendations include:
| Lighting | ISO Range |
|---|---|
| Bright daylight | 100–200 |
| Cloudy weather | 200–400 |
| Indoor lighting | 800–1600 |
| Night scenes | 3200–6400 |
The Nikon Z5 handles higher ISO values remarkably well, making it a dependable camera for low-light photography.
Balancing the Exposure Triangle
Exposure is never about one setting alone. Every adjustment affects the others.
For example:
- Opening the aperture lets in more light but reduces depth of field.
- Increasing shutter speed freezes action but requires more available light.
- Raising ISO brightens the image while increasing the chance of visible noise.
Understanding these trade-offs helps you make creative decisions with confidence instead of depending entirely on automatic settings.
Improving Autofocus Performance
One of the strongest features of the Nikon Z5 is its reliable autofocus system. Choosing the correct focus mode for the subject can dramatically improve sharpness and consistency.
Whether you’re photographing landscapes, portraits, wildlife, or moving subjects, learning how autofocus behaves is an important step toward producing consistently sharp photographs.
Autofocus Modes Explained
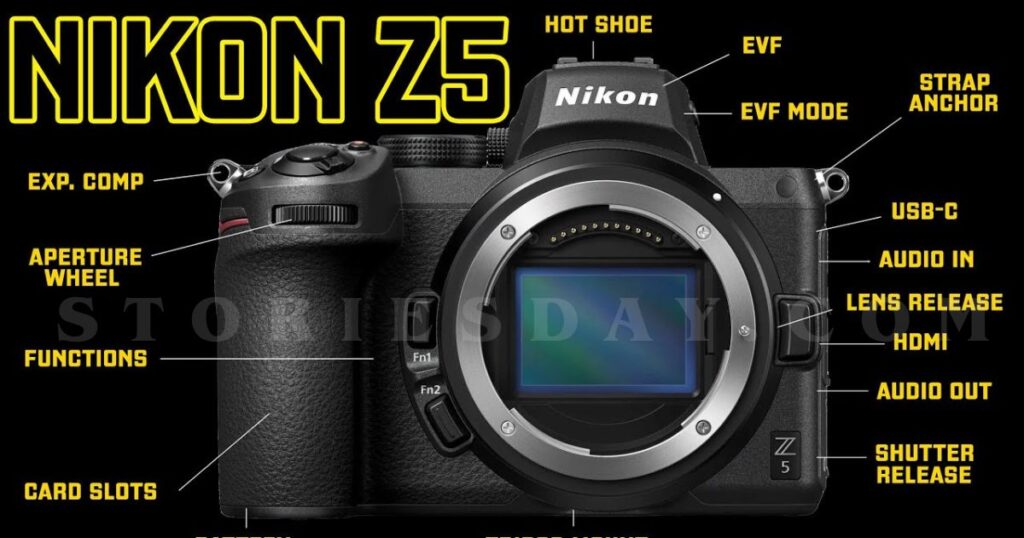
Understanding autofocus is one of the fastest ways to improve your photography. The Nikon Z5 offers several autofocus options, and selecting the right one for the scene helps you capture sharper images with less effort.
AF-S (Single-Servo AF)
AF-S is intended for subjects that remain still. The camera locks focus once, making it an excellent choice for situations where your subject isn’t moving.
This mode is ideal for:
- Landscapes
- Architecture
- Product photography
- Still-life photography
- Posed portraits
Once focus is confirmed, you can recompose your shot if needed before pressing the shutter.
AF-C (Continuous-Servo AF)
AF-C continuously adjusts focus as your subject moves through the frame.
Choose this mode for:
- Sports
- Wildlife
- Birds
- Children at play
- Pets
- Street photography
When combined with continuous shooting, AF-C helps increase your chances of capturing sharp images during fast action.
Choosing the Right AF-Area Mode
The autofocus area determines where the camera looks for focus.
Some of the most useful options include:
Single-Point AF
Offers precise control and works well when photographing stationary subjects.
Wide-Area AF
Useful for portraits and larger subjects where you want the camera to focus within a broader section of the frame.
Dynamic-Area AF
Designed for moving subjects that may briefly leave your selected focus point.
Auto-Area AF
Allows the camera to identify subjects automatically, making it convenient for everyday photography.
Trying different combinations of focus and area modes will help you discover which settings best match your shooting style.
Eye-Detection Autofocus
Eye-Detection AF has become one of the Nikon Z5’s most appreciated features.
When photographing people, the camera can detect and focus directly on the subject’s eye, helping produce consistently sharp portraits.
For the best results:
- Enable Face and Eye Detection.
- Use AF-C if the subject is moving.
- Keep enough light on your subject for reliable detection.
- Review your images occasionally to confirm focus accuracy.
This feature works particularly well for family photography, events, lifestyle sessions, and travel portraits.
Optimizing Image Quality
Camera settings are important, but consistently high-quality images also depend on how you capture and process each photograph.
Photograph in RAW
RAW files contain significantly more information than JPEG files, giving you greater flexibility during editing.
Advantages include:
- Better recovery of bright highlights
- Improved shadow detail
- More accurate color adjustments
- Flexible white balance correction
- Reduced quality loss during editing
If you enjoy editing your images, RAW provides the best starting point.
Make the Most of Image Stabilization
The Nikon Z5 includes five-axis in-body image stabilization, which reduces blur caused by small camera movements.
This feature is especially helpful when photographing:
- Indoor scenes
- City streets after sunset
- Museums
- Travel destinations
- Handheld portraits
Although stabilization helps, maintaining proper shooting technique remains important for consistently sharp results.
Use the Appropriate Metering Mode
Metering determines how the camera measures light before selecting exposure.
The Nikon Z5 offers several options:
- Matrix Metering
- Center-Weighted Metering
- Spot Metering
- Highlight-Weighted Metering
Matrix Metering is an excellent default choice because it evaluates the entire scene and usually provides balanced exposures.
Spot Metering becomes useful when your subject is much brighter or darker than its surroundings.
Customizing the Camera
One advantage of the Nikon Z5 is the ability to personalize controls so frequently used settings are always within easy reach.
Assign Function Buttons
Custom buttons reduce the need to search through menus.
Many photographers assign shortcuts such as:
- ISO adjustment
- White balance
- Focus mode
- AF-area selection
- Exposure compensation
These shortcuts allow quicker adjustments when lighting changes unexpectedly.
Organize “My Menu”
“My Menu” lets you collect commonly used settings in one convenient location.
Helpful items include:
- Memory card formatting
- Battery information
- Silent shooting
- Interval timer
- Multiple exposure
- Firmware information
Keeping these options together makes the camera easier to operate in the field.
Save Custom Shooting Modes
The mode dial allows custom shooting presets that can instantly recall your preferred settings.
For example:
U1 – Landscape
- ISO 100
- Aperture Priority
- Single AF
- Matrix Metering
U2 – Action
- AF-C
- Continuous shooting
- Auto ISO
- Fast shutter speed
Saving these presets eliminates repeated adjustments when switching between photography styles.
Practical Photography Techniques
Understanding camera settings is only part of becoming a better photographer. Applying them effectively in different situations makes the biggest difference.
Landscape Photography
Landscape photography rewards careful composition and patience.
Useful recommendations include:
- Use a tripod whenever possible.
- Keep ISO low for maximum detail.
- Choose an aperture around f/8 to f/11.
- Include foreground elements to create depth.
- Shoot during golden hour for softer light.
The Nikon Z5’s full-frame sensor captures excellent dynamic range, making it easier to retain detail in bright skies and darker foregrounds.
Portrait Photography
Natural-looking portraits depend on both technical settings and lighting.
For pleasing results:
- Focus on the nearest eye.
- Use Eye-Detection AF.
- Choose a wide aperture when appropriate.
- Position subjects in soft natural light.
- Keep backgrounds simple to avoid distractions.
Good communication with your subject is just as important as camera settings.
Wildlife Photography
Wildlife photography requires preparation and quick reactions.
Helpful practices include:
- Use Continuous AF.
- Select a fast shutter speed.
- Enable burst shooting.
- Increase ISO when necessary.
- Learn animal behavior to anticipate movement.
Patience often leads to stronger images than constantly changing settings.
Travel Photography
The Nikon Z5 is well suited to travel because of its compact size and weather-resistant body.
While exploring new destinations:
- Carry spare batteries.
- Photograph during early morning or late afternoon.
- Capture both wide scenes and small details.
- Look for interesting light rather than famous landmarks alone.
These habits help tell a more complete story of your journey.
Low-Light Photography
Full-frame cameras perform particularly well in challenging lighting.
To improve nighttime images:
- Use image stabilization effectively.
- Increase ISO only as needed.
- Choose wider apertures when available.
- Hold the camera steadily.
- Consider using a tripod for longer exposures.
Thoughtful exposure choices often produce cleaner results than relying solely on high ISO values.
Common Mistakes to Avoid
Even experienced photographers develop habits that reduce image quality. Recognizing these issues early helps improve consistency.
Leaving Every Setting on Auto
Automatic settings are convenient but limit creative control.
Learning exposure modes gradually gives you greater flexibility in different situations.
Ignoring the Histogram
The camera’s LCD can appear brighter or darker depending on viewing conditions.
Checking the histogram provides a more reliable indication of exposure.
Forgetting Lens Maintenance
Dust, fingerprints, and smudges reduce image clarity.
Carry a microfiber cloth and lens blower to keep your equipment clean.
Choosing the Wrong Focus Mode
Many soft images result from incorrect autofocus settings rather than equipment problems.
Always match the autofocus mode to the movement of your subject.
Overlooking Composition
Sharp focus and correct exposure cannot compensate for weak composition.
Before pressing the shutter, pay attention to:
- Leading lines
- Framing
- Symmetry
- Background distractions
- Subject placement
- Natural light direction
Thoughtful composition creates photographs that are both technically strong and visually engaging.
Continue Learning and Practicing
Every photography session provides an opportunity to improve. Rather than trying every feature at once, concentrate on mastering one skill at a time. Practice exposure during one outing, autofocus during another, and composition on the next.
Review your photographs afterward and identify patterns. Notice which settings consistently produce good results and where adjustments are needed. Over time, these observations will become second nature, allowing you to focus more on creativity than camera controls.
Reading the official manual, experimenting with different lenses, and photographing a variety of subjects will also help you become more comfortable with the Nikon Z5’s capabilities.
Conclusion
This Nikon Z5 pocket guide has covered the essential settings, practical techniques, and customization options that can help you get the most from your camera. While the Nikon Z5 offers many advanced features, success comes from understanding when and why to use them rather than relying on automatic settings alone.
By building a solid foundation in exposure, autofocus, image quality, and composition, you’ll create sharper, more consistent photographs across a wide range of subjects. As your confidence grows, don’t hesitate to experiment with new techniques and creative approaches. Photography is a skill developed through practice, observation, and curiosity, and the Nikon Z5 provides an excellent platform for that journey.
Frequently Asked Questions
Is the Nikon Z5 suitable for beginners?
Yes. Its intuitive controls, reliable autofocus, and helpful automatic features make it an excellent choice for beginners while offering enough advanced capabilities for long-term growth.
Should I use RAW or JPEG?
RAW is recommended if you plan to edit your images because it retains more detail and offers greater flexibility. JPEG is ideal for quick sharing and everyday use.
What autofocus mode is best for moving subjects?
AF-C (Continuous-Servo AF) is the preferred choice because it continuously tracks subjects as they move.
Does the Nikon Z5 perform well in low light?
Yes. The full-frame sensor and in-body image stabilization help produce clean, detailed images in dim conditions when paired with appropriate settings.
Which accessories are most useful for the Nikon Z5?
A fast Z-mount lens, extra batteries, high-speed SD cards, a sturdy tripod, and a protective camera bag are among the most useful accessories for everyday photography.
